Essential Takeaways for Paper Piecing Success
Welcome to the club! Whether you're meticulously isolating a single motif from a Tula Pink print or stitching your first English Paper Piecing hexagon, you're in the right place. Grab a cup of tea, settle into your sewing space, and let's talk about all things fussy cutting.
When starting a new geometric tessellation, the initial choice dictates the entire workflow. You are choosing between hand portability, machine precision, motif control, or pattern adaptation.
- English Paper Piecing (EPP): Your portable kit can be kept remarkably compact. I usually pack 6-10 pre-basted units, one small thread spool, a needle case, clips, and a 4-6 inch pair of scissors.
- Foundation Paper Piecing (FPP): Reliable accuracy usually comes from shortening the machine stitch to the 1.5-1.8 mm range so the paper tears away cleanly without loosening the seams.
- Fussy Cutting: This technique needs extra fabric beyond ordinary strip cutting because motifs must be isolated. Directional prints often require buying enough yardage to repeat the motif at least 4-8 times for a symmetrical block.
The Fundamentals of English Paper Piecing (EPP)
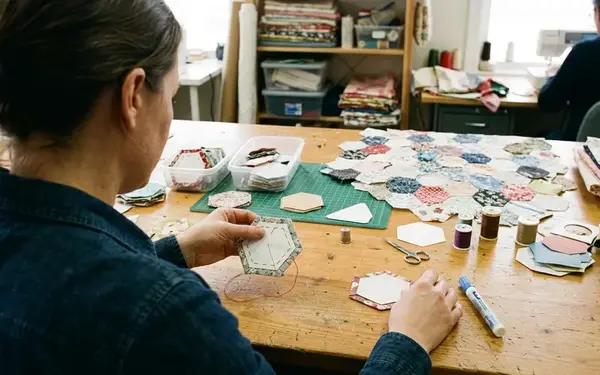
Let's break down the mechanics of EPP. The process follows a strict structural sequence. You choose a repeatable shape, stabilize it with paper, baste the fabric around it, and then join the units with small edge stitches.
Common EPP papers are cut from medium card. They need to be stiff enough to survive 2-4 rounds of handling, especially for shapes with acute points like diamonds, pentagons, and elongated triangles. A practical basting allowance is 3/8 inch around the paper. Narrower allowances fray sooner on tight curves and sharp points.
I often think about insights from Katie of Handmade by Kate. As a lawyer turned EPP specialist quilter, she balances a demanding schedule with slow stitching. Sessions of just 20-45 minutes are enough to baste a small stack of shapes or join one side of a rosette without unpacking a full sewing station.
When tackling complex medallion-style patterns, such as the famous La Passacaglia by Willyne Hammerstein, author of Millefiori Quilts, preparation is everything. Collaborative testing revealed that these rosettes require sorting fabrics by value before color. A typical rosette benefits from at least three value groups: light, middle, and dark.
Precision and Symmetry: The Art of Fussy Cutting
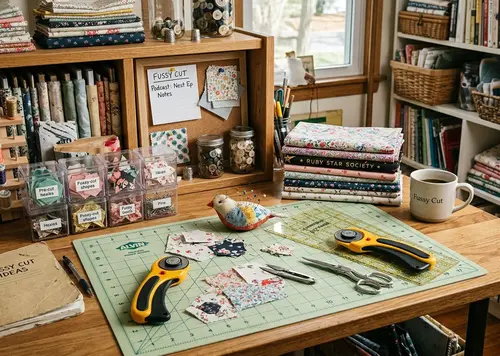
Fussy cutting is the deliberate isolation of a specific fabric motif. It transforms a standard block into a kaleidoscope of pattern.
Use a clear acrylic template with the sewing line marked separately from the cutting line. The visible motif should sit inside the finished shape, not merely inside the seam allowance. When centering a flower or animal face, leave at least 1/8 inch between the key visual feature and the finished seam line so the design is not clipped after stitching.
The mirror method creates perfect symmetry. Cut the first motif right side up. Next, locate the matching repeat and place the second template as a flipped duplicate before cutting.
Podcast host and 'Fussy Cutters Club' author Ange Wilson approaches motif selection with incredible precision. Her process documentation supports checking directional repeats over a 12-18 inch length of fabric before cutting, because many illustrated prints repeat vertically and horizontally at different intervals.
Critical Insight: A mirrored fussy-cut block can lose symmetry if the print repeat is slightly staggered rather than perfectly gridded. Always verify the repeat structure across a larger cut of yardage.
Mastering Foundation Paper Piecing (FPP)
FPP shifts the control from your hands to the sewing machine. The foundation dictates the exact seam order, allowing for highly precise geometric designs.
Because FPP is sewn through the printed foundation with fabric placed on the unprinted side, each seam is stitched in reverse order from how the finished block appears. A 1/4 inch add-a-seam ruler keeps bulk consistent. This is vital where 5-9 pieces meet in a small geometric block.
Fabric selection makes or breaks an FPP design. A high-contrast novelty print can look exciting in yardage but fail in FPP if the motif is chopped into unreadable fragments by narrow seam sections. Instead, lean on tone-on-tone fabrics. Kristy of Quiet Play emphasizes their utility. They provide texture at close range while still reading as one color family from 3-6 feet away.
Kristy's multi-year partnership with Riley Blake Designs highlights her industry standing, though her specific methodology for isolating tone-on-tone values is what truly stabilizes complex FPP geometry. During recent wholesale-season sample sewing, designers commonly prepare small blocks, color cards, and companion mockups in the weeks before launch materials are due.
Scaling Down: Mini Mini Quilts and Companion Patterns
Companion patterns designed specifically to complement larger quilt projects are gaining traction. The 'mini mini' quilt trend allows makers to test complex blocks before committing to a full-sized quilt.
Mini-mini quilts often finish in the 4-8 inch range. They are perfect for swaps, pin boards, ornaments, or pattern tests. A single test block can be completed over 2-4 short sessions covering cutting, paper preparation, assembly, and pressing.
Scaling down requires structural adjustments. When reducing an FPP block, check whether any finished fabric sliver will be narrower than 1/4 inch. Pieces smaller than that can disappear entirely after pressing and quilting. For EPP minis, 1/2 inch and 3/4 inch templates demand sharper needles and thinner thread than standard 1 inch templates because corner bulk accumulates faster.
The same 1 inch hexagon template feels manageable in quilting cotton but becomes unworkably bulky in canvas, linen blends, or heavily metallic printed fabric.
Peer feedback indicates that curating fabrics for these tiny blocks is an art form. Chelsea, owner of Pink Door Fabrics, frequently highlights how small-scale prints read differently when isolated. Meanwhile, practitioners like Laura Samulionyte, an audio editor who pieces during long studio sessions, find that these miniature formats provide the perfect tactile break from digital work.
Understanding the Scope and Limitations of Paper Piecing
Every technique has structural boundaries. Acknowledging these limitations prevents project abandonment.
EPP is a slow-crafting method. A hand-pieced EPP rosette with many small shapes can take several evenings—even before it is joined into a larger background. It is not suited for rapid quilt completion.
FPP carries a distinct learning curve regarding spatial awareness. New FPP makers should expect the first 2-3 practice blocks to include at least one reversed fabric placement or undersized patch until the flip-and-cover motion becomes familiar.
Risk Factor: FPP becomes frustrating on very loosely woven fabric because repeated folding, pressing, and paper removal can distort bias-heavy sections.
Fussy cutting inherently produces more fabric waste than traditional rotary cutting. You will generate offcuts around isolated motifs. Saving pieces larger than 1.5 inches square helps recover usable fabric for corner units, labels, or scrappy borders.
Finally, paper removal requires patience. Removing foundation paper is easiest after seams are fully pressed and the block has cooled for a few minutes, reducing distortion from warm bias edges.
Recommendation: Mark both the cutting line and the finished sewing line on fussy-cut templates to ensure your isolated motif remains perfectly centered after assembly.