Welcome to the club! Whether you're meticulously isolating a single motif from a Tula Pink print or stitching your first English Paper Piecing hexagon, you're in the right place. Grab a cup of tea, settle into your sewing space, and let's talk about all things fussy cutting.
Contents
- Key Takeaways: Navigating the Millefiori Journey
- The Magic Behind the Millefiori Aesthetic
- Essential Tools for High-Complexity EPP
- Fussy Cutting Strategies for Dynamic Rosettes
- Scope and Limitations: Managing a Masterpiece
- Assembly and Stitching Techniques for Interlocking Shapes
Key Takeaways: Navigating the Millefiori Journey
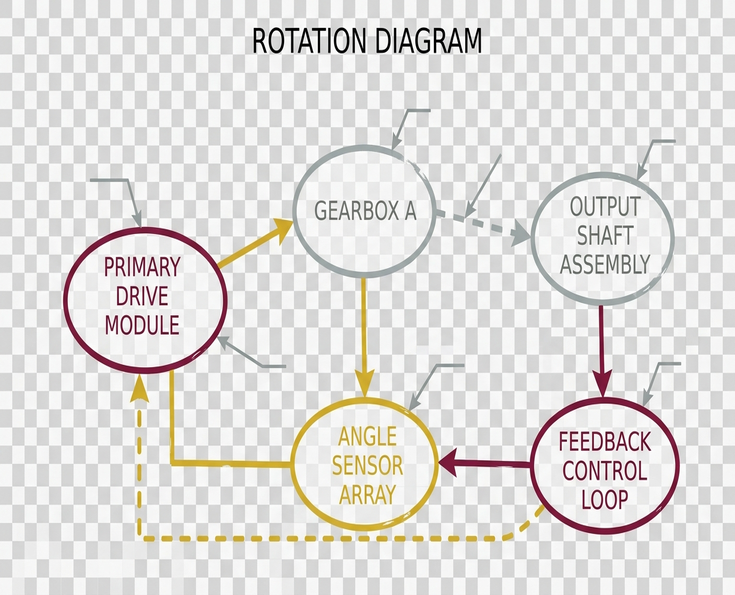
Millefiori quilts rely on precise English Paper Piecing (EPP) and intentional fussy cutting to create kaleidoscope effects. A complete large EPP top in this style commonly occupies 18 to 48 months of hobby stitching when worked for 4 to 7 hours per week. Success requires specific tools, high-quality paper pieces, and a systematic approach to managing hundreds of small components.
Critical Insight: A realistic starter plan is to complete one test rosette before cutting the full quilt. Gather 5 to 12 repeated motifs, 1 focal fabric, 1 quieter connector fabric, and 1 labeled storage envelope per shape family.
Plan your preparation in sessions of 45 to 90 minutes. Longer cutting sessions often lead to motif drift because the eye stops checking repeat placement carefully.
The Magic Behind the Millefiori Aesthetic
Willyne Hammerstein: author of Millefiori Quilts, creates designs that transform static fabric into dynamic, spinning rosettes. The strongest spinning effect usually comes from motifs with clear directionality: leaves, stripes, medallions, paisleys, birds, or flower heads spaced at repeat intervals of 2 to 8 inches.
Five-sided and ten-point arrangements ask the eye to read rotation in 36-degree or 72-degree steps. Because of this strict geometry—and the unforgiving nature of interlocking stars, even a 1/8-inch motif shift can be visible at the center of a rosette. This visual movement shares DNA with the mathematical principles of Penrose tilings, where interlocking shapes create continuous, non-repeating patterns.
Traditional EPP tolerates slow hand assembly, but Hammerstein-style layouts add a rigorous planning layer. The same print may need to be cut 5, 10, or 20 times from identical positions before the first seam is sewn.
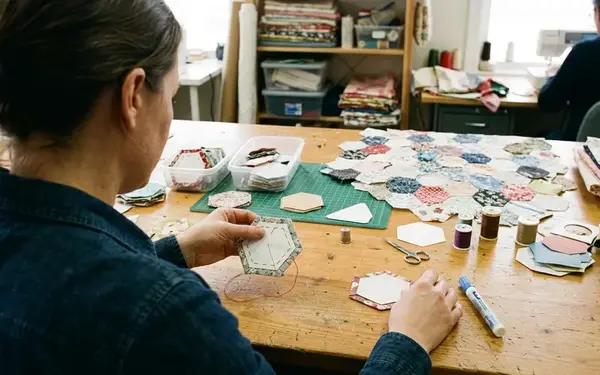
Essential Tools for High-Complexity EPP
Standard EPP supplies fall short for intricate interlocking shapes. Clear acrylic templates should show the finished shape line plus a 1/4-inch seam allowance. Etched lines are more reliable than printed lines because they remain readable after repeated use.
Paper pieces in the 120 to 160 gsm range hold up well to glue basting and repeated handling while still bending at sharp points without creating a bulky ridge. Context-dependent variation plays a role here. Dense batiks, loose-weave linen blends, and crisp quilting cottons behave differently under glue basting, so the same paper weight and thread choice can produce different bulk at tight intersections.
Recommendation: For stitching, 50wt cotton is a forgiving general choice. Switch to 80wt cotton where dark fabric meets pale fabric and thread visibility becomes obvious. Size 10 or 11 milliners or sharps needles give better control at tight inside corners than larger general hand-sewing needles.
Fussy Cutting Strategies for Dynamic Rosettes
I was recently chatting with Chelsea: owner of Pink Door Fabrics, about finding the right repeat in modern yardage. Before cutting yardage, test one paper window over the fabric repeat and confirm that the chosen motif appears at least 5 or 10 times with enough seam allowance around every repeat.
Start by marking a transparent template with a single registration point, such as the center of a flower, the tip of a leaf, or the intersection of two printed lines. A hinged mirror preview works best when the mirrors are opened to 72 degrees for fivefold effects or 36 degrees for tenfold star effects.
For a five-part rosette, cut 5 identical pieces from the same motif position. For a ten-point star, cut 10, and add 1 or 2 spare pieces if the fabric has enough repeat length.
We tried cutting 10 diamonds from a floral print because each piece looked pretty alone, but the flower center sat 1/8 inch higher on three of them. Once sewn into a star, the center wobbled instead of forming a clean kaleidoscope, so we switched to strict registration marking to fix the alignment.
Use low-volume or small-scale connector fabrics in gaps under 1 inch wide so the eye has a resting path between high-contrast rosettes.
Scope and Limitations: Managing a Masterpiece
Workshop experience shows that scale management is fundamentally a craft-safety issue. Keep each active rosette or partial unit in a separate labeled bag with the shape code, fabric swatch, number of pieces cut, number basted, and number sewn.
A practical working board size is 12 by 18 inches for lap stitching and up to 18 by 24 inches for table planning. Larger boards become awkward once several rosettes are attached. Once a section grows beyond roughly 24 inches across, support it on a table or pillow while stitching so the hanging weight does not distort bias edges.
Risk Factor: Very large directional prints can defeat even careful fussy cutting if the usable motif appears fewer times than the rosette requires.
For a large top, schedule assembly in zones: rosettes first, connector rings second, border or infill units last. This keeps unfinished edges from being handled for months.
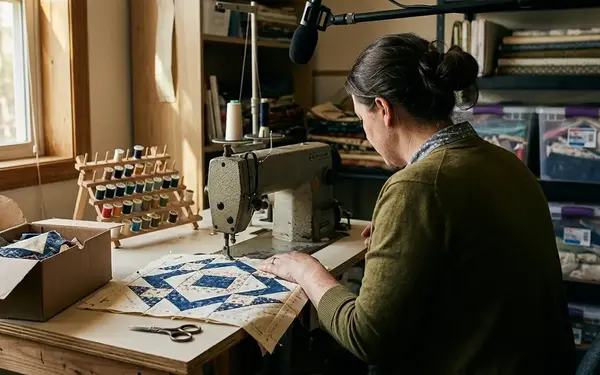
Assembly and Stitching Techniques for Interlocking Shapes
Working through these joins ourselves, we found that seam control dictates the final aesthetic. Whipstitch with bites of 1 to 2 fabric threads and spacing near 1/16 inch when joining high-contrast fabrics. Longer bites are faster but become visible on pale-dark joins.
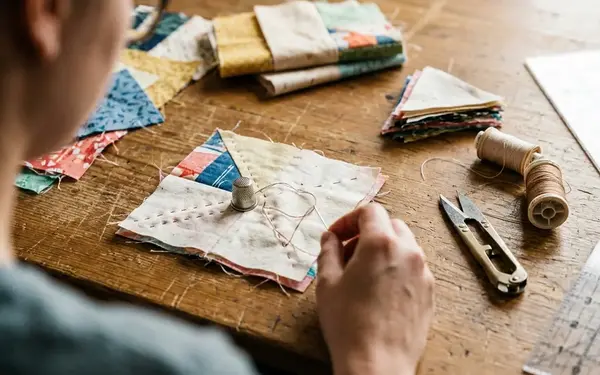
Flat back stitch is useful for display quilts because the thread travels mostly behind the folded edges, reducing ladder-like thread marks on the front. I often listen to podcasts cut by Laura Samulionyte: audio editor, to keep a steady rhythm while tackling these long, precise seams.
At a 10-point center, join units in pairs first, then pairs into quarters or halves, rather than forcing all points into one seam sequence. Do not remove papers from an edge piece until every side of that piece has a neighboring shape attached. Unsupported outer edges are the easiest place to stretch or fray.
When removing papers, start with the oldest enclosed center pieces and leave the perimeter papers in place until the adjacent section is ready to join. While our work focused primarily on standard quilting cottons, these tension rules apply universally across fabric types.