The Evolution of Geometric Patchwork
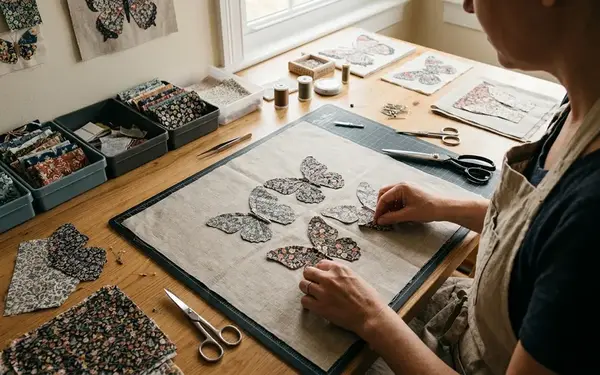
Welcome to the club! Whether you are meticulously isolating a single motif from a Tula Pink print or stitching your first English Paper Piecing (EPP) hexagon, you are in the right place. Grab a cup of tea, settle into your sewing space, and let's talk about the math behind fussy cutting.
The foundational concepts of scale and repeat were established long before modern acrylic templates arrived in our studios—early quilters drafted complex blocks using basic geometry, paper, and pencil. The link between early drafting and modern fussy cutting comes from reconstructing the same geometric sequence. You establish a radius, repeat equal intervals, connect the intersections, and add a fabric allowance.
For a regular hexagon, the compass radius equals the finished side length. A 1-inch radius therefore drafts a hexagon with six 1-inch sides. Exploring the historical precedent of geometric patchwork reveals that a traditional paper template represents the finished patch face. The fabric is commonly cut 1/4 inch beyond each edge to provide material for basting. Understanding this history grounds modern fussy cutting in proven mathematical principles.
The Core Pillars of Quilt Math
The three pillars of quilt math are applied in a fixed order because each answers a different purchasing or placement question. Scale dictates how a fabric's print size interacts with your chosen English Paper Piecing shape. You check scale first to learn whether the motif fits the finished shape. Repeat determines the frequency of a motif, directly impacting yardage requirements. Usable motif area accounts for seam allowances, ensuring your chosen design remains visible after stitching.
A 1-inch-side regular hexagon measures 2 inches from point to point and roughly 1.73 inches across opposite flat edges. Those are the maximum face dimensions available for the design. For six matching patches, locate six complete motif occurrences before cutting. Record both the selvage-to-selvage spacing and the repeat measured parallel to the selvage.
Decoding Fabric Scale for English Paper Piecing
Scale is the proportional relationship between the fabric's design elements and the finished patchwork piece. Large-scale prints require larger EPP templates to maintain the integrity of the illustration. Conversely, micro-florals and ditsy prints act as 'read-as-solid' blenders when cut into small geometric shapes.
Scale is evaluated by measuring the motif's smallest enclosing width and height, then comparing that box with the finished EPP face rather than the fabric cutting piece. Rotation is part of the decision process. A centered circular motif can fit completely inside a 1-inch-side regular hexagon only when its diameter is no greater than roughly 1.73 inches.
On a 3/4-inch-side hexagon, the visible face is 1.5 inches point to point and about 1.3 inches across the flats. A 1.5-inch flower may touch the points but will be clipped along the side edges.
Critical Insight: Scale evaluation must always prioritize the finished face dimensions over the raw cutting size to prevent unexpected cropping during assembly.
The Mechanics of Pattern Repeat and Yardage
A pattern repeat is the physical distance between one motif and its exact duplicate on the fabric bolt. Calculating repeats is essential for creating kaleidoscopic effects in fussy cutting. Yardage estimates for fussy cutting must account for the specific manufacturer's printing methods, as repeat lengths can vary significantly between brands.
Repeat is found by choosing an unmistakable landmark, such as the tip of a particular leaf, and measuring to the identical landmark in the next occurrence. Measuring across two repeat intervals and dividing by two yields a highly accurate number. If identical landmarks appear 25 inches apart over two vertical intervals, the verified vertical repeat is 12.5 inches.
When one usable motif occurs per vertical repeat, six 3-inch-tall cutting areas span roughly 65 inches from the top of the first area to the bottom of the sixth. This calculation includes five 12.5-inch gaps plus one 3-inch cutting height—a critical measurement for purchasing.

Two prints with similar-looking motifs may require different yardage because one repeats in straight columns while the other uses a sideways half-drop or alternates motif orientation. One catch exists in this process. A half-drop or mirrored layout may shift the next matching motif sideways, so a vertical measurement alone cannot establish how many identical orientations are available across the cloth.
Reviewing the fabric sourcing strategies shared by Chelsea: owner of Pink Door Fabrics, the necessity of mapping both vertical and horizontal repeats becomes undeniable. Though this specific measurement technique assumes a standard rotary-printed cotton, the underlying logic applies universally.
Symmetry and the Usable Motif Area
Symmetry in fabric design allows quilters to create secondary patterns when joining identical fussy-cut shapes. The 'usable motif area' is the exact portion of the fabric that will be visible on the front of the quilt, excluding the standard quarter-inch seam allowance. Failing to calculate the usable area often results in clipped motifs and lost design details.
The usable motif area is defined from the finished paper shape because that boundary becomes the visible seam line after assembly. A motif anchor is selected inside that boundary, commonly a flower center or geometric intersection. Six identical 60-degree rotations around a common center complete a full 360-degree kaleidoscopic arrangement.
Analyzing the intricate rosette constructions detailed by Willyne Hammerstein: author of Millefiori Quilts, the reliance on precise motif anchoring is evident.
Risk Factor: A flower can appear fully enclosed inside the fabric cutting outline yet lose its outer petals after the 1/4-inch margins are wrapped behind the EPP paper. With a 1/4-inch seam allowance, any detail located only in the outer 1/4-inch cutting margin will be wrapped behind the paper and will not appear on the quilt front.
Translating Theory into Placement Strategy
Strategic placement involves isolating the optimal usable motif area before making a single cut. Using the concepts of scale and repeat allows quilters to predict how a fabric will behave once pieced. We see that this theoretical knowledge reduces fabric waste and increases design confidence.
Placement begins by outlining the finished window over every candidate occurrence before marking a cutting line. Each candidate is checked for motif completeness, matching orientation, and a sufficient surrounding margin. For a six-patch rosette, mark all six centers and all six outer cutting boundaries before separating any patch from the yardage.
Keep at least the intended seam allowance between a finished window and a raw fabric edge. For a 1/4-inch allowance, a motif that fits but lies only 1/8 inch from an earlier cut cannot supply the full turning margin. Observing the meticulous workflows documented by Laura Samulionyte: audio editor, the discipline of marking all boundaries prior to making irreversible cuts is a universal principle of precision work.
Your Next Step: Build a Viewing Window Template
Recommendation: The viewing tool is made from opaque cardstock so the surrounding print cannot distract from the proposed crop.
Cut a hole matching your finished EPP shape out of a piece of opaque cardstock. Slide this viewing window over your fabric to instantly evaluate scale, repeat, and usable motif area. The finished EPP shape is traced and removed from the center, then a center point and orientation marks are added.
For a 1-inch-side hexagon, cut a six-sided window with 1-inch edges, a 2-inch point-to-point span, and an approximately 1.73-inch flat-to-flat span. Add a center dot plus registration marks at 12, 3, 6, and 9 o'clock. Matching those references keeps repeated motifs from drifting or reversing between patches.
Take a sheet of heavy, opaque cardstock right now and draft your primary EPP shape in the center. Cut out the interior window, mark your crosshair registration points at the cardinal directions, and slide it over your most challenging fabric yardage to lock in your first perfect fussy-cut placement.