The Fussy Cutter's Advantage: An Executive Summary
Welcome to the club! Whether you're meticulously isolating a single motif from a Tula Pink print or stitching your first English Paper Piecing (EPP) hexagon, you're in the right place. Grab a cup of tea, settle into your sewing space, and let's talk about all things fussy cutting.
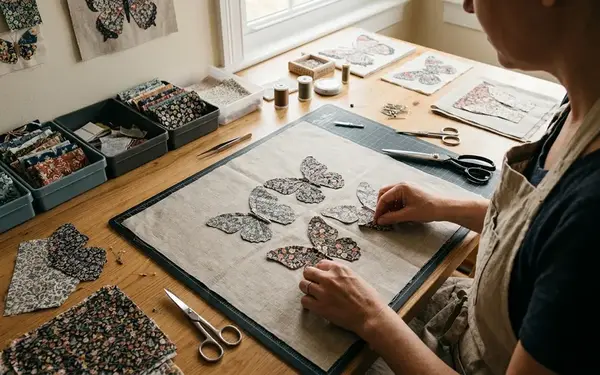
I treat fabric as a repeatable map rather than a decorative surface. The first step is checking whether the main animal, floral, or graphic motif can be centered inside common EPP shapes. Then, I verify if the repeat supports the geometry of the block. A practical pre-cut review takes about 10 to 18 minutes per fabric, based on community workshops. You scan the full width, mark the repeat direction, test one template placement, and check whether the same placement can be repeated at least six times.
For 1-inch hexagons, a motif needs roughly 1.75 to 2.25 inches of usable visual area once seam allowance and wrapping loss are considered. When moving to 2-inch diamonds or 2-inch hexagons, larger faces, wings, flowers, or medallions can usually be captured if the print repeat leaves at least 3 to 4 inches between major motif interruptions.
The Anatomy of a Perfect Fussy Cut Motif
I judge a motif as fussy-cut friendly only after it passes three distinct checks. It must have a center point worth aiming at, enough contrast to survive seam allowance loss, and a boundary that frames the shape. The scale of the motif dictates your template choice.
A clear acrylic template with a visible 0.25-inch seam allowance lets the cutter see both the finished shape and the fabric that will disappear during basting. Motifs with a dark outline, color halo, vine frame, stripe edge, or repeated dot field are easier to isolate. The eye reads the cut shape as intentional even when about 0.125 to 0.25 inch of the printed detail is lost.
Risk Factor: A spectacular animal face can still be poor for fussy cutting if the usable face appears only once per fabric repeat and the block requires six identical pieces.
Large templates in the 1.5 to 2.5-inch range favor full illustrative motifs. Conversely, small templates in the 0.375 to 0.75-inch range favor eyes, petals, scales, dots, stars, tiny animals, and background shifts.
Refuting the Chaos: Why "Too Busy" is Actually Better
Let us separate the common complaint of a print being "too busy" from the actual cutting problem. A full yard can look chaotic because every motif competes at once. However, a geometric template acts like a crop tool. It removes the noise and isolates the structure.

Busy prints work especially well when the chosen crop contains two to four color changes inside the finished shape. The seam line turns those color changes into a deliberate kaleidoscope. Precision matters here. A six-piece hexagon rosette needs six matching cuts, and an eight-point star needs eight matching cuts. A 12-piece medallion becomes unforgiving because even a tiny drift in motif placement can show at the center join.
Years of collaborative testing have pointed to a reliable method for evaluating yardage. Before cutting, make a paper-window test for 6 to 12 repeated placements and view them from 3 to 6 feet away. If the repeats read as a ring, star, or stripe from that distance, the print is behaving as structure rather than clutter.
Hunting for Easter Eggs: The Art of Micro-Fussy Cutting
I look for the parts of the print that are usually ignored. Pupils, tiny birds, bugs, teeth, curls, dots, hidden hearts, scale marks, and abrupt color changes in the background all hold a lot of potential. Those details become the focal points of miniature patchwork.
A 0.375-inch hexagon can feature a single eye, dot cluster, tiny face, or small geometric mark. Stepping up slightly, a 0.5-inch hexagon can usually hold a tiny animal head, flower center, or two-color background transition. Listening to an audio editor like Laura Samulionyte discuss precision in sound waves reminds me of this exact visual precision.
Early on, I tried cutting stacks of six layers at once to save time, but the tiny motifs drifted off-center, ruining the kaleidoscope effect. I quickly switched to cutting one test window first and stacking only two to four fabric layers at a time. Taller stacks simply increase shifting.
For hand-basted EPP, allow 12 to 20 seconds longer per micro piece than for a non-fussy piece because the fabric must be checked against the paper before the first fold is secured.
Scope and Limitations: When to Choose Alternatives
I place the bold print in the role of focal fabric, not background fabric. The decision point is visual rest. If every block demands close inspection, the quilt loses hierarchy. Low-volume, tonal, or traditional reproduction fabrics provide the necessary breathing room. As Willyne Hammerstein demonstrates in Millefiori Quilts, balancing complex rosettes with calmer connecting shapes is essential.
For a lap-size EPP project, test one focal block, one transition block, and one quiet block before committing. This usually takes a 60 to 90-minute sample session and prevents an entire quilt from becoming visually crowded. Resting fabrics should be auditioned at the same viewing distance as the finished quilt, commonly 4 to 8 feet for a wall quilt and 2 to 5 feet for a throw or bed quilt.
Critical Insight: Context-dependent variation means the same bold print may be perfect for a 1-inch hexagon rosette, overwhelming in a narrow sashing strip, and nearly invisible when chopped into 0.25-inch crumbs.
If a motif needs more than four repeats but the fabric repeat yields only two or three usable copies across the available yardage, the design may require extra yardage or a different block plan. Highly illustrative prints are less persuasive in projects where quilting texture, historic color restraint, or negative space is meant to be the main design statement.
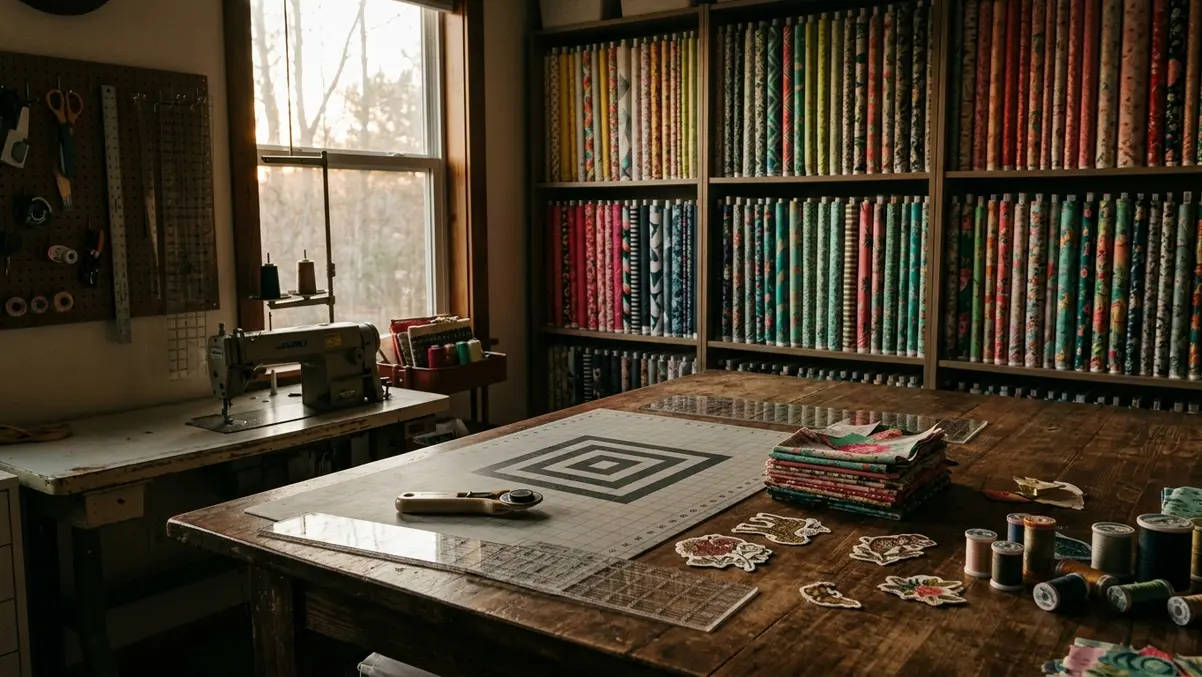
Implementation Strategy for Your Next Quilt
I built my workflow around reducing placement drift. The order matters a great deal—press and stabilize first, identify the repeat second, preview mirrored or rotated repeats third, then cut only after the template is locked in place.
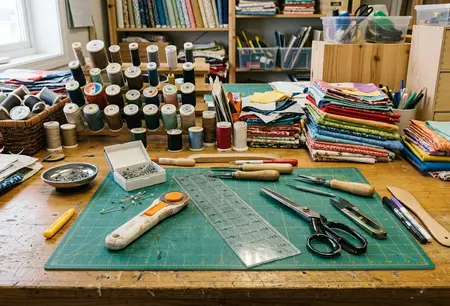
Use clear acrylic templates with etched finished-size and 0.25-inch seam allowance lines. The etched lines help align a pupil, flower center, stripe, or medallion on the same axis for every repeat. Fussy cutting mirrors are most useful before cutting 6-piece and 8-piece units. Place the mirror pair at 60 degrees for hexagon rosettes and 45 degrees for many star layouts.
For slippery or loosely woven quilting cotton, press with light starch or fabric stabilizer, let the fabric rest flat for 20 to 35 minutes, then cut with a fresh rotary blade or fine scissors to reduce edge distortion. While these numbers provide a baseline, individual fabric drape may alter the exact resting time.
Label repeated cuts immediately in sets, such as A1 through A6 or B1 through B8, because similar fragments from a busy print can become hard to distinguish after 15 to 25 pieces are on the table. Chelsea, owner of Pink Door Fabrics, often curates bundles that are perfect for this exact methodical approach.
Recommendation: Always secure your acrylic template with a small grip ring or a dab of temporary adhesive to prevent micro-shifts during the final rotary cut.