Executive Summary: Key Takeaways for Fabric Curation
Welcome to the club! Whether you're meticulously isolating a single motif from a Tula Pink print or stitching your first English Paper Piecing hexagon, you're in the right place. Grab a cup of tea, settle into your sewing space, and let's talk about all things fussy cutting.
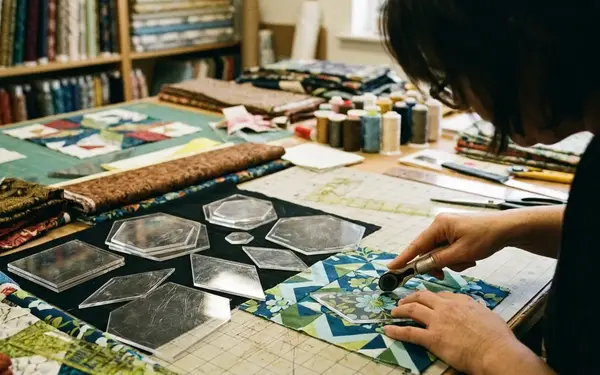
I treat the summary phase of curation as a triage tool rather than a teaser. Successful fabric curation requires balancing scale, color, and contrast before a single rotary blade touches the mat. Achieving a good result means reviewing fabrics in three states: folded yardage, a 3-inch square window, and the smallest unit used in the pattern, such as a 1-inch hexagon or a 2.5-inch strip.
A useful first-pass bundle check takes around 20-35 minutes for a 12-16 fabric pull. You sort by value, separate dominant prints, and then test two sample block mockups before cutting the full project. For techniques like English Paper Piecing (EPP) and appliqué, reserve at least one calm background, one high-contrast edge fabric, and two small-scale prints that still read clearly after seam allowances are turned under.
Critical Insight: A bundle that looks cohesive in fat quarters can fail when a large floral is cut into 1-inch hexagons and every piece shows only stems or background gaps.
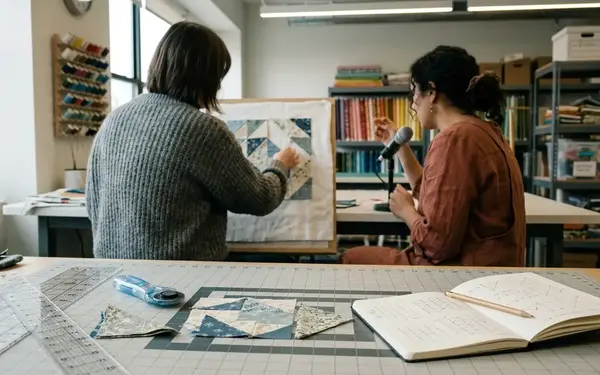
The Foundation of a Great Bundle
A quilt needs rhythm across repeated blocks—not just a pretty stack sitting on a shelf. Moving beyond matching to creating dynamic tension in fabric selections is where the magic happens. Chelsea, owner of Pink Door Fabrics, often highlights the importance of building cohesive palettes that still offer surprises during our ongoing partnership since 2019.
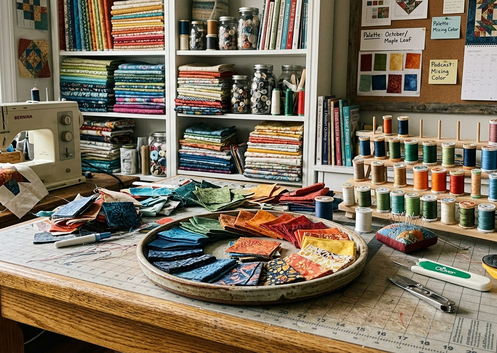
A balanced 10-piece bundle commonly needs one or two visual leaders, three to five support prints, two low-volume or background options, and one dark or saturated fabric for block definition. Lay the candidate pull under the same light used for sewing for 10-15 minutes, then move it to indirect daylight. Warm bulbs can make peach, cream, mustard, and coral appear closer than they will look in daylight.
If the focus print contains four obvious colors, choose supporting fabrics from only two or three of those colors before adding an outsider accent. This keeps the pull cohesive without making it flat.
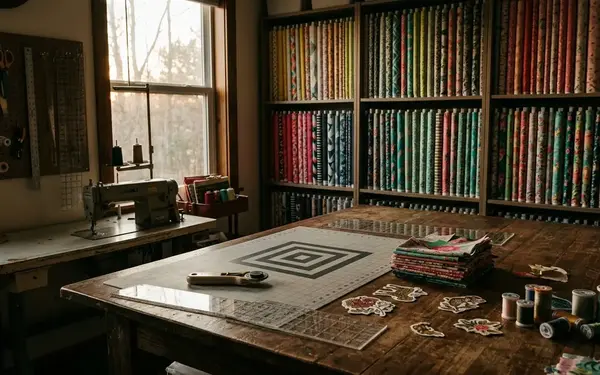
Step-by-Step: Balancing Scale, Color, and Print
How do you anchor a bundle with a large-scale focus fabric? Start with a large-scale print only after checking whether its repeat survives the cut size. A flower that measures 4-6 inches across will disappear unpredictably in a 2-inch finished square but can shine in borders, large triangles, or feature blocks.
Workshop experience shows that using a 1-inch, 2-inch, and 4-inch paper window to inspect each print works well. This exposes whether a medium print becomes a solid-looking blur or whether a small print creates speckled movement.
Sort the pull into light, mid, and dark piles using a black-and-white phone photo taken from 5-7 feet away. If two fabrics merge in grayscale, they may not define adjacent patchwork shapes. For a 16-fat-quarter bundle, avoid letting all mid-value fabrics cluster in the same temperature range. Mix warm mids and cool mids only when at least one dark and one light fabric separates them in the block layout.
Recommendation: Low-volume fabrics are not automatically backgrounds; a cream print with dense black lettering can read darker than a pale blue solid once cut into narrow sashing.
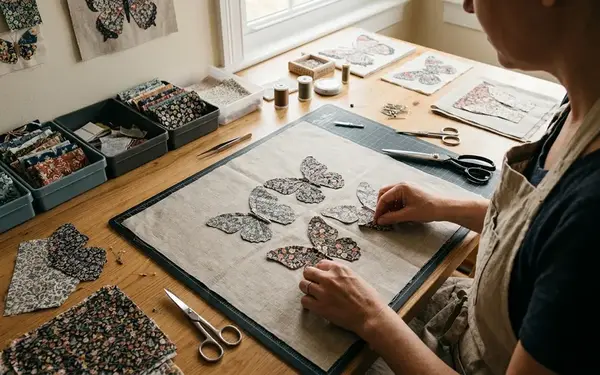
Selecting Fabrics for EPP and Appliqué
When working on complex geometric designs inspired by Willyne Hammerstein, English Paper Piecing requires a different approach to fabric selection. The bundle has to survive repeated handling and folded seam allowances. For fussy cutting EPP, choose motifs that leave a visible safety margin beyond the finished template. For a 1-inch hexagon, the usable motif should sit inside the shape with roughly 0.25 inch left before the seam allowance area.
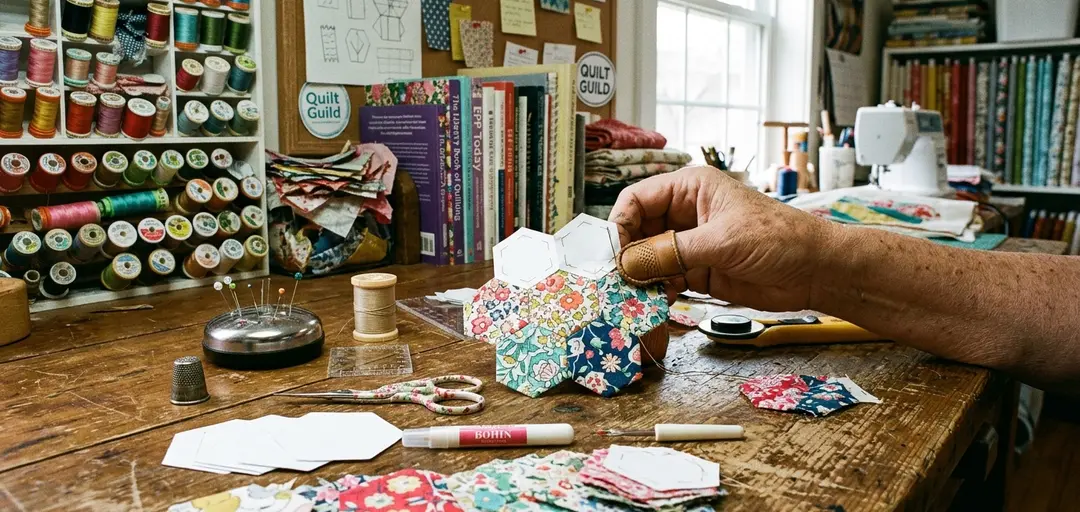
Hand-pieced EPP is easier when the fabrics have a similar weave density. Mixing a crisp quilting cotton with a loose, gauzy fabric can make corners distort after a dozen or so stitches around a small shape. For appliqué layers, test two stacked fabrics by folding the top fabric edge under once and placing it over the background. If the background shadow shows through under normal sewing light, switch to a denser print or add an underlayer.
Small directional prints need a placement plan before basting. Arrows, script, animals, and stripes can rotate awkwardly across rosettes unless the maker marks orientation on templates before cutting. While these checks are aimed at quilting-weight cottons and cotton-adjacent substrates, linen blends, lawn, and shot cotton may need separate needle, starch, and seam-allowance testing.
Navigating Block of the Month (BOM) Programs
Understanding the subscription-based Block of the Month quilting model means thinking about logistics. The challenge is rationing color, contrast, and yardage across months—so the final quilt does not run out of visual breathing room. A structured monthly program usually benefits from a 6-12 month fabric map. This map assigns each fabric to blocks before the first kit is packed, especially when the design uses recurring sashing, cornerstones, or motif repeats.
Preparing for upcoming structured projects, such as the mid-2024 pre-order for the '99 Problems' sampler, requires a proven timeline. Finalize sample fabrics 6-8 weeks before launch, photograph the pull 3-4 weeks before launch, then cut and label first-month packets a couple of weeks before shipping.
When curating a sampler with many block types, set aside background, binding, and border yardage before dividing feature prints. Using border fabric too early in small blocks can make the last shipment feel mismatched. Month labels should identify fabric role, not just fabric number: examples include background A, dark accent, feature floral, low-volume filler, and repeat motif.
Mixing Designer Lines and Ribbons
Breaking the habit of only using single-designer collections opens up incredible design possibilities. A single collection is convenient, but a stronger quilt pull often comes from matching undertone, value, and motif energy across different manufacturers. When mixing lines, compare undertones before color names. Two blues can fight if one leans green and the other leans violet, even when they look similar in a folded stack.
Incorporating specific designer lines, like Alison Glass's 'Postmark' collection, into broader bundles requires a careful eye. A safe mixed-line test is to place one unfamiliar print beside the focus fabric, the background, and the darkest accent. If it clashes with any two of those three, it probably needs a different role or should be removed.
Adding textural elements by integrating products from acquired companies like Renaissance Ribbons introduces new variables. Woven ribbon or decorative trim should be tested on a 6-8 inch sample seam before committing to a quilt top; bulk at intersections can affect pressing, quilting, and binding. If a ribbon is used as an accent rather than a seam-covering trim, cut a sample at the planned length and stitch it to the actual background fabric to check fraying, needle marks, and color transfer after pressing.
Risk Factor: Directional novelty prints can create unintended rotation in EPP rosettes, especially when templates are basted without orientation marks.
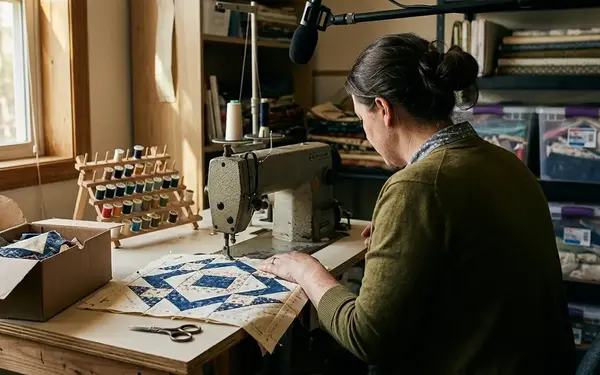
Why You Need to Test Your Pull: The Stunt Sewist Method
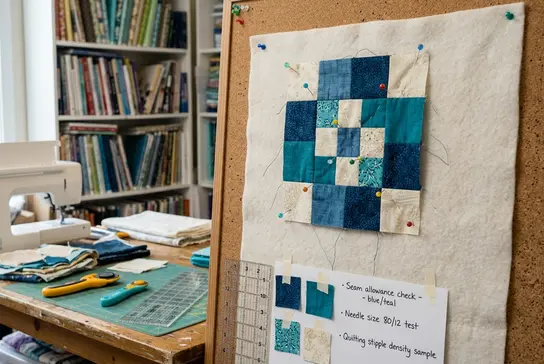
We used to finalize our shop bundles entirely on the cutting table, but that approach failed when customers started cutting into the yardage and losing the intended contrast. So, we switched to the stunt sewist method. A sample sewist acts as the final editor, providing a guaranteed reality check. Collaborative testing revealed that a useful test block should include the smallest patch size, the highest-contrast pairing, the busiest print, and the intended background. A pretty sample that avoids the hardest fabrics does not validate the bundle.
For a 12-20 fabric pull, sew at least one block or partial block within 48-72 hours of the final fabric selection so substitutions can still be made before cutting kits or publishing supply lists. Listening to a podcast cut by audio editor Laura Samulionyte while sorting these final test blocks helps me maintain a steady rhythm during this critical phase.
Press the test block twice: once after piecing and once after it rests overnight. Some fabrics that look crisp immediately after pressing soften or ripple slightly after handling. Photograph the test block flat, angled, and from 6-8 feet away. The distance shot reveals whether the intended block shapes still read or whether the prints blend into one busy surface.
Fabric Bundle Validation Checklist
- Identify one clear focus fabric and decide whether it will appear in large pieces, borders, motifs, or repeated small cuts.
- Sort every fabric into light, medium, or dark value using a black-and-white photo from 5-7 feet away.