Podcast editing for a quilting audience starts with a simple constraint: our listeners usually have their hands full. They are basting papers, pressing seams, cutting fabric, or driving to guild. That changes the job.
I do not edit a craft conversation as if someone will sit still and study it. I edit so the thread of the story stays clear while the listener keeps stitching.
Contents
- Tuning In: The Magic Behind the Crafting Conversations
- From Sewing Room to Recording Studio: An Interview on Setup
- The Editing Philosophy: Keeping It Real vs. Polished
- Tools of the Trade: Software and Hardware for Crafters
- Overcoming Audio Challenges: Background Noise and Mistakes
- Why the Voice Matters in the Quilting Community
Tuning In: The Magic Behind the Crafting Conversations
The best craft podcast edit feels almost invisible. Not absent. Not careless. Just tuned well enough that a listener can follow a guest talking about English Paper Piecing, inherited fabric, or a complicated fussy cutting decision without reaching for the rewind button.
A quick-scan production workflow
For a typical 45- to 60-minute finished episode, I expect to begin with roughly 70 to 110 minutes of raw interview audio. That raw file includes mic checks, pattern digressions, repeated questions, restart points, and the small conversational loops that happen when two makers get excited.
- Intake check: confirm the files open, play cleanly, and match the session notes.
- Rough story cut: shape the episode around the strongest through-line.
- Detailed cleanup: remove distractions without sanding off the guest’s personality.
- Level balancing: even out host and guest volume before music or final polish.
- Intro and outro placement: give the episode a clear front door and a gentle exit.
- Export review: check the rendered file against the session timeline.
- Final listen: test on earbuds and a small speaker before publishing.
I try to do the first listening pass within a day or two of recording. Memory helps. I can still tell whether a pause was thoughtful, or whether someone was looking up the exact quilt name, book title, or pattern note.
Clean audio is not the same as sterile audio
Here is the practical tension: a quilting podcast needs enough polish to respect the listener’s time, but enough human texture to feel like company. If Laura Samulionyte: audio editor sends back a pass that keeps a laugh, a breath, or a soft moment of hesitation, that choice is usually doing story work.
Critical Insight: Edit to enhance the story, not to erase the person telling it.
That is the rule I come back to when the waveform gets messy.
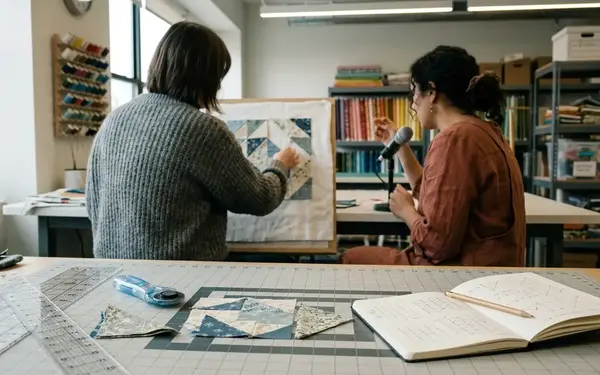
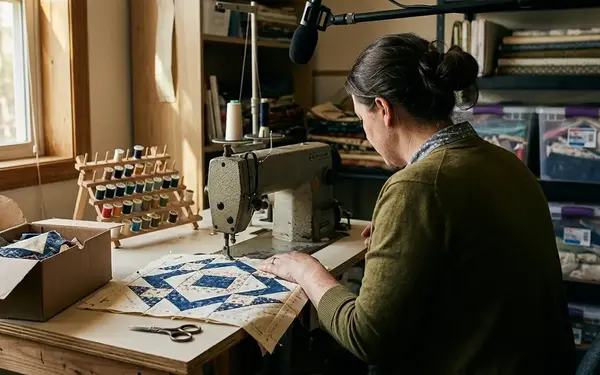
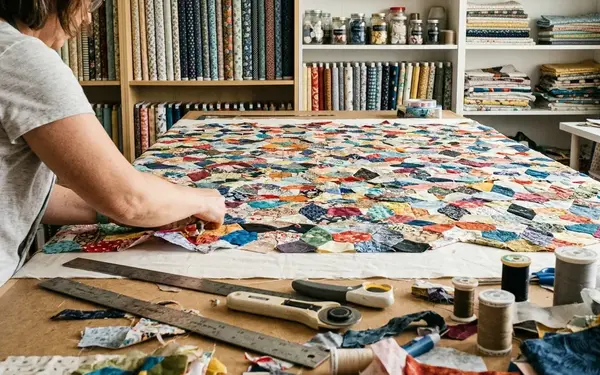
From Sewing Room to Recording Studio: An Interview on Setup
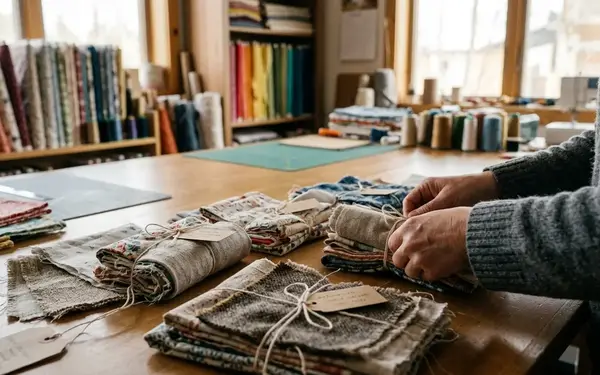
The sewing room can become a recording room, but it needs a little discipline first. Fabric helps. Clutter does not.
Q: What changes first when the sewing space becomes the recording space?
A: I start by identifying the hard reflective surfaces: the cutting table, the bare wall near the machine, the window glass, and the laminate or timber floor. Those surfaces throw the voice back at the microphone and create a bright room sound.
A quilt-filled room helps with reflections, but a room packed with plastic storage bins, rulers, glass frames, and a bare cutting table can still sound sharp unless the speaker records close to the mic.
Q: Do quilts really improve the sound?
A: Yes, in a very practical way. Draped quilts and fabric-heavy shelving dampen echoes. They do not replace good mic technique, but they make the room kinder.
My setup window is usually around 20 to 35 minutes: hang or drape quilts, silence the sewing machine, test chair squeaks, record half a minute or so of room tone, then do a short voice check.
- Clear loose tools from the cutting table within arm’s reach of the mic.
- Move scissors, acrylic rulers, clips, and bobbins before pressing record.
- Keep the microphone roughly 12 to 18 cm from the speaker’s mouth.
- Place the mic slightly off-axis, with a pop screen or foam shield between speaker and capsule.
Words like “piecing” and “pattern” can send breath bursts into the capsule. A small pop screen fixes more than people expect.
Q: What microphone quality matters most?
A: Warm, intimate vocal tone comes from proximity and consistency before it comes from expensive gear. I want the guest close enough that the room recedes, but not so close that every breath becomes a thump.
Recommendation: Choose a reliable close vocal microphone before buying extra accessories. The best setup is the one you can repeat without fuss before every episode.
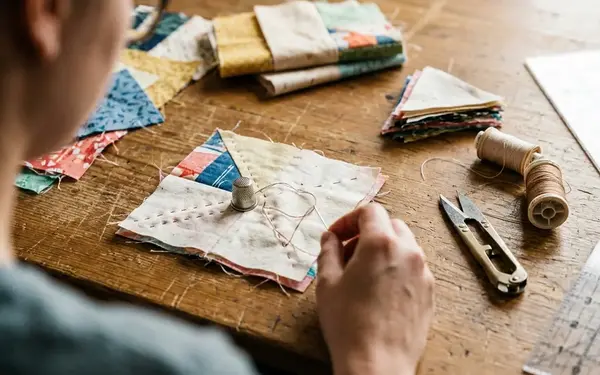
The Editing Philosophy: Keeping It Real vs. Polished
Fast, highly polished editing may suit a tutorial episode with step-by-step cutting instructions. A memory-heavy interview about inherited fabric needs longer pauses and more breathing room.
What an “um” is doing
I do not cut every filler sound by reflex. I ask what job it is doing in the conversation.
If an “um” is simply a verbal reset between two complete thoughts, it usually goes. Single filler sounds under a second are often removed when they sit between clean clauses. Longer hesitations are different. If a guest is choosing careful words about a family quilt, I would rather shorten the pause than erase the emotional rhythm.
A natural pause of roughly half a second often stays before a reflective answer. Dead air caused by page-turning, internet lag, or searching for a pattern name gets tightened.
Keeping trust in the room
Workshop experience shows that listeners can hear when a conversation has been over-handled. The voice starts to feel clipped. The guest sounds like they are being hurried.
That matters in a community built around handwork. Genuine laughs, deep breaths, and even the occasional quiet sewing-machine hum can make the episode feel companionable rather than manufactured.
Risk Factor: If every pause disappears, the interview may become efficient but emotionally thin.
The final pacing target is conversational. Answers should feel spontaneous, but repeated restarts, doubled words, and false openings need trimming so a listener can follow while stitching without looking at a screen.
Tools of the Trade: Software and Hardware for Crafters
The gear list should not become another unfinished project. For crafters, the better question is not “What looks professional?” It is “What can I maintain every week?”
The lean kit
For a new quilting podcast, I would start with one close vocal microphone, one pair of closed-back headphones, a stable recording app, a pop filter, and a repeatable export preset. Once the space is familiar, setup time can stay within 15 to 25 minutes.
- Microphone: close enough for vocal warmth, forgiving enough for home rooms.
- Closed-back headphones: useful for catching chair squeaks, mouth clicks, and background hum during recording.
- Multitrack audio editor: essential for splicing host and guest tracks cleanly.
- Pop filter: cheap, boring, and genuinely helpful.
- Export preset: keeps publishing from becoming a fresh decision every time.
If you publish through major podcast platforms, check the current standard podcast audio requirements before setting your final export routine.
EQ and compression without the fog
My beginner chain is plain: high-pass filtering in the 70 to 90 Hz range, a gentle cut around the low-mid muddiness area if the room sounds boxy, light presence shaping for speech clarity, then compression with a modest ratio in the 2:1 to 3:1 range.
That chain helps voices sit clearly over real-world listening conditions: a sewing machine in the next room, road noise in the car, or the soft rustle of papers during EPP.
Remote guests need setup instructions that sound achievable. I ask them to record in a carpeted room or fabric-heavy space, sit away from a window, and keep the microphone 15 to 20 cm from their mouth rather than relying on a laptop mic across the table.
Recommendation: Build a repeatable chain before chasing a perfect chain. Consistency makes editing faster and listening easier.
Overcoming Audio Challenges: Background Noise and Mistakes
The hardest edits are not always the loudest. A steady hum can be workable. A single bright clank through one important word can wreck the sentence.
Sort the problem before touching the tool
I separate audio issues into three buckets: steady noise, sudden noise, and missing information.
- Steady noise: machine hum, distant fan noise, or a consistent room tone under the whole recording.
- Sudden noise: ruler taps, rotary cutter clicks, dropped snips, chair knocks, or scissors hitting the table.
- Missing information: internet dropouts, clipped words, or a guest’s instruction disappearing mid-sentence.
A sewing-machine hum can be tolerable if it sits quietly under the whole interview, but a single presser-foot clank during a key word may require a rerecord because software cannot recreate missing speech.
Risk Factor: Noise-reduction tools can make a voice sound watery or metallic when pushed hard against short, bright sounds like ruler taps, rotary cutter clicks, or dropped snips.
Remote lag and missing words
Remote interviews add another layer. When lag causes visible overlap, I usually cut the host’s back-channel sounds first, then restore a fraction of a second of natural space before the guest answer begins.
Sharp tool noises are easiest to remove when they fall between words. If the sound crosses a consonant or vowel, the cleaner fix is often to borrow room tone from elsewhere and shorten the surrounding phrase rather than apply heavy noise reduction.
When an audio dropout removes only a connector phrase, the sentence can often be rebuilt from the guest’s next clause. When it removes a measurement, fabric name, or instruction step, the host needs a pickup line recorded later.
That pickup line is not a failure. It is maintenance.
Why the Voice Matters in the Quilting Community
Audio carries companionship differently from a blog post or a pattern PDF. A voice can sit beside someone through a long seam.
Editing for real listening conditions
For English Paper Piecing listeners, steadiness matters. They may be basting papers, whipstitching seams, or sorting a fussy cutting stack from Pink Door Fabrics while Chelsea talks through a fabric pull. They may not have a free hand to adjust volume.
That is why I review in real conditions: earbuds at low sewing-room volume, a small speaker across the table, and a car-style listening check for road noise masking soft speech.
Episodes intended for hand-stitching companionship benefit from steady loudness, clear consonants, and fewer abrupt volume jumps. This is not glamour work. It is care work.
Inviting the community back in
The strongest community prompts belong near the end, after the guest’s story has resolved and before the outro music. Those last few minutes are where invitations feel connected rather than bolted on.
- Ask listeners to share quilt photos related to the episode theme.
- Invite short voice notes from makers working through similar projects.
- Collect topic ideas from guild groups, swaps, and EPP circles.
- Point listeners toward the next conversation without rushing the current one.
When someone is slowly building a Millefiori-inspired project after reading Willyne Hammerstein, or isolating one tiny motif for a rosette centre, the podcast becomes part of the making rhythm. The edit should protect that feeling.
Critical Insight: The voice is not decoration. In a quilting podcast, it is the room we invite listeners into.
If you are a crafter thinking about starting your own show, begin smaller than your ambition. Record one clear conversation. Listen back quickly. Notice where your attention drifts. Fix that before buying more gear.

Then keep going. Our community has room for more voices, especially the careful ones.