Welcome to the club! Whether you're meticulously isolating a single motif from a Tula Pink print or stitching your first English Paper Piecing hexagon, you're in the right place. Grab a cup of tea, settle into your sewing space, and let's talk about all things fussy cutting. Today, we tackle the most intimidating fabrics in your stash and transform them into highly structured, breathtaking geometric designs.
Harnessing Chaos for Geometric Precision
Overcrowded, chaotic novelty prints build the most powerful geometric secondary patterns in modern patchwork. Quilters often gravitate toward simple, predictable fabrics for complex piecing, fearing that busy prints will muddy the final design. The opposite holds true. A densely packed novelty fabric provides a rich, varied palette of textures and color transitions that solid fabrics simply cannot offer. Success requires ruthless isolation. Showcasing the entire fabric design dilutes the geometric impact of the block. By isolating specific motifs and ignoring the surrounding illustrations, a busy print yields a dynamic, cohesive block.
Looking at historical examples of chintz applique and fussy cutting reveals a long tradition of isolating specific motifs to create new visual rhythms. We apply that same analytical rigor to modern novelty fabrics. The worked example begins by choosing one small fragment of a crowded novelty print. Repeating that fragment in six diamonds gives the eye a dependable rhythm. The surrounding print, however lively, no longer sets the block's structure.
The example uses six identical 60-degree English Paper Piecing (EPP) diamonds arranged point-to-point around one center. The source print contains 12 distinguishable colors. The chosen fragment makes three of them visually dominant in the assembled block. This drastic reduction in color noise creates a striking visual anchor. The eye registers the newly formed geometric shape long before it processes the individual elements of the original fabric design.
Taming the Kitchen-Sink Stash Orphan
Picture a novelty cotton crowded with overlapping flowers, tiny hats, leaves, and bright background marks. Viewed as a whole, it offers several competing focal points. A quilter cannot readily see where a diamond's edges will lead the eye. Across the proposed diamond-sized view, a flower edge, part of a hat, and background marks all compete for attention. The sheer volume of visual information overwhelms the geometry of a quilt block.
These densely packed cottons—often featuring overlapping flowers, tiny hats, leaves, and bright background marks, frequently become stash orphans. Quilters who have guided fabric selection for years recognize this kind of kitchen-sink print as a familiar challenge. A recent fabric pull curated by Chelsea: owner of Pink Door Fabrics highlighted exactly this type of densely packed material. It feels unusable for structured patchwork at first glance. The fabric demands attention in too many directions simultaneously.
A 2-inch finished-side diamond provides a defined viewing area for judging what remains visible after sewing. This boundary is critical. Without a physical frame, the human eye naturally tries to make sense of the entire illustration. Placing the template down forces the brain to evaluate only the colors and shapes within that specific two-inch window. The overlapping flowers and tiny hats cease to be illustrations. They become abstract shapes waiting for realignment.
Precision Framing and the Art of Color Editing
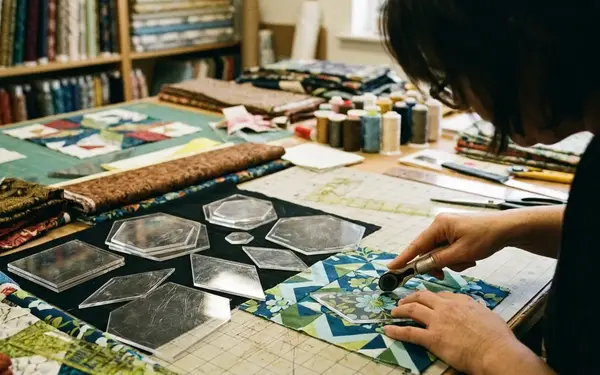
Place a clear acrylic 60-degree diamond viewing window over the print. Rotate it until the same petal tip occupies the same corner in six repeats. The transparency of the acrylic allows for exact positioning over the chaotic print. Shift the window a few millimeters at a time to keep that tip. Push a clashing hat or leaf beyond the finished edge. Test shifts of roughly 2–4 mm before marking all six cutting positions.
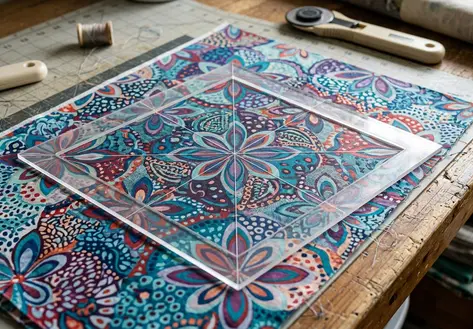
Check the cutting outline, alongside the visible window. The unwanted marks must fall into the 1/4-inch seam allowance outside the finished edges. This prevents them from reappearing on the front of the block. The 2–4 mm window shift matters immensely at the finished diamond edge. A stray hat or leaf changes from hidden seam allowance to visible noise with just a slight misalignment.
The Payoff of Millimeter Shifts
This six-piece repeat needs six complete occurrences of the chosen fragment. Each occurrence requires enough surrounding fabric for the seam allowance. Finding six identical repeats in a scattered novelty print requires patience and a methodical approach to scanning the yardage. Drawing on a review of layouts by Willyne Hammerstein: author of Millefiori Quilts, the finding follows that exact repetition creates the strongest secondary patterns. The precision of the cut dictates the success of the final block.
The process of color editing through fussy cutting involves choosing a framing that intentionally excludes clashing colors present just millimeters away on the fabric. You are actively deciding which colors participate in your block and which colors remain hidden in the seams. Queuing up a podcast mixed by Laura Samulionyte: audio editor provides a steady rhythm for this highly focused phase of millimeter adjustments. The repetitive nature of aligning the template, checking the seam allowance, and marking the fabric benefits from a calm, focused environment.
The Kaleidoscopic Transformation
Baste each cut diamond around its paper. Keep the petal tip at the marked corner. The basting process secures the fabric to the paper template, ensuring the carefully chosen motif remains exactly where you planned it. Sew neighboring edges until all six points meet. Six matching 60-degree diamonds meet at the center. Each contributes a 60-degree point to the final star.
The repeated tips form a small central star. The edited background colors form a second ring. Those junctions create the kaleidoscopic effect. The hat and the flower lose their original identities, merging into a new geometric shape. The viewer sees a glowing star surrounded by a halo of color, completely unaware that the source material featured tiny hats and overlapping leaves.
Measuring the Geometric Shift
In the worked color plan, three colors dominate the finished face. This compares dramatically with the 12 visible colors in the source print. One petal tip repeated across six 60-degree diamonds turns a 12-color kitchen-sink print into a three-color-dominant star and outer ring. The original context of the novelty print vanishes—replaced entirely by a sharp, kaleidoscopic block.
The secondary patterns emerge where the points meet. The precision of the fussy cutting ensures that these intersections are crisp and intentional. The chaotic novelty print has been entirely subdued. The resulting block feels deliberate, structured, and highly sophisticated. The transformation from a messy, overwhelming fabric to a tightly controlled geometric unit demonstrates the true power of fussy cutting.
Dictating the Fabric's New Narrative
Treat the print as a supply of repeatable color fragments. The original illustration simply provides raw material for your new design. Put the viewing window through the middle of the most conspicuous motif. Look for a useful edge or color transition. Let the diamond's repeated points decide what the fabric says in the block.
Before cutting all six pieces, mark one trial diamond's finished outline and its 1/4-inch cutting margin directly on the fabric. Compare the trial fragment at six rotational positions around the proposed center before committing to the remaining cuts. This verification step ensures that the secondary pattern behaves exactly as anticipated. It confirms that the seam allowances will successfully hide the unwanted elements of the busy print.
Force the fabric to tell your geometric story. Stop treating novelty prints as precious illustrations. Start treating them as raw palettes of color and texture. Take your busiest, most intimidating fabric and cut right through the middle of the main motif to find the hidden geometry inside. Commit to the millimeter shifts, trust the acrylic template, and slice directly into the chaos to extract the perfect geometric block.