Why Clamshell Curves Distort Fussy-Cut Prints (And Three Rules to Stop It)
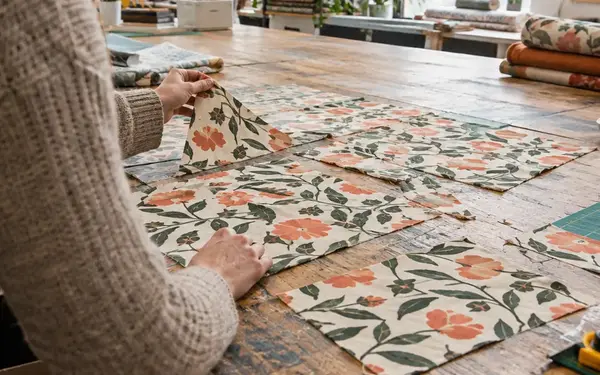
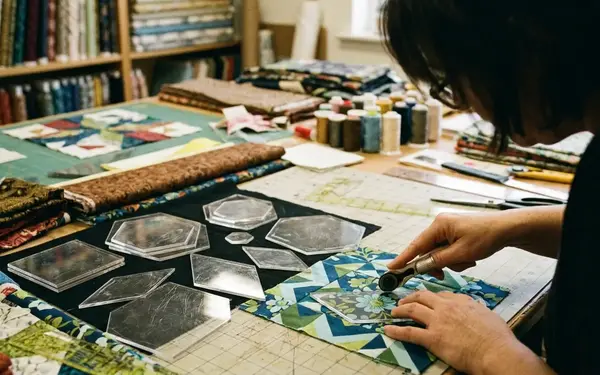
Hold an acrylic clamshell window over a treasured floral cotton at the cutting mat. The bloom sits neatly beneath the arch. Now follow its stem toward the lower side points and lay the neighboring row’s paper shapes over it: some of those carefully chosen petals disappear beneath the overlap.
That missing-petal problem starts before the scissors come out. Choose the motif from the finished exposed area, with neighboring papers in position, rather than judging the entire cutting window.
I keep three checks beside the mat:
- Place the important part of the motif inside the upper dome, clear of the finished seamline.
- Glue-baste the top convex curve, leaving the lower concave tails and side points loose.
- Match both side registration points before securing the apex and committing to the joining stitches.
Compared with a straight-edged hexagon, a clamshell makes a small placement change conspicuous: the eye follows both the curved seam and the printed flower. Slide the window sideways by close to 2 millimeters as a deliberate check. Does a petal touch the seamline? Does the stem lose its intended position? That movement gives you a useful placement tolerance before cutting.
Protect The Petals
A centered flower can still lose its lower petals. Audition three papers together: the proposed motif piece and the two neighboring shapes that establish its overlap.
Auditing Fabric Scale and Marking Registration Points on Clamshell Papers
A rounded bouquet or teardrop gives the upper arch something sympathetic to frame. Rigid stripes demand closer scrutiny because each curved seam interrupts their direction. For this floral example, keep your attention on one bloom: its outer petals, the stem’s exit point, and the space between them and the finished edge.
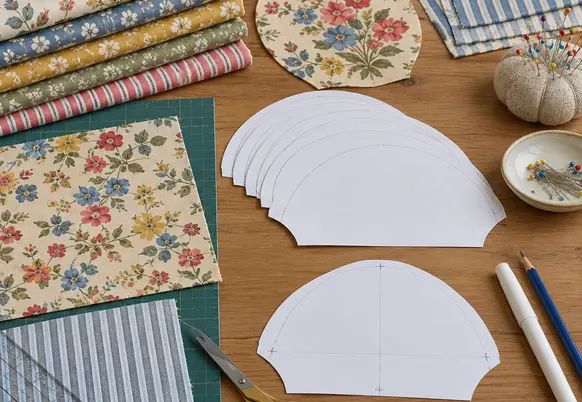
- Separate display space from allowance. Use the acrylic template’s finished seamline to position the flower. Keep the 1/4-inch cutting allowance outside that outline.
- Build the overlap on the mat. Place neighboring papers in the intended row direction. Their actual arrangement determines what disappears; assuming that exactly half the flower will remain visible can mislead you.
- Prepare firm papers. Choose cardstock that resists bending under thread tension. Mark the apex and both side points on the back of every paper before cutting fabric.
- Locate the true apex. On a symmetrical template, measure halfway between the side points, then follow that centerline to the top arc.
These handling directions assume standard quilting cotton. With lightweight lawn or loosely woven linen, lightly starch a scrap, let it dry, and press it first. Check that the motif remains square and the edge stays stable before treating the project fabric.
For a proposed wave border, rotate the paper layout 90 degrees on the mat. A stem that reads upright in the main rows may point sideways along that edge.
Basting the Top Arc Without Pleating the Seam Allowance
The basting goal is a smooth finished arc with the flower still on its registration marks. Small folds can gather within the allowance; sharp folds running across the finished curve need attention.
- Anchor the placement. Put the paper against the fabric’s wrong side and pin through the central motif area. Hold it against a bright window or light pad to check the flower before adding glue.
- Apply a narrow glue swipe. Place water-soluble fabric glue on the paper just inside the upper convex edge. Keep it away from the exposed fabric fold where the needle will pass.
- Turn the apex first. Fold the allowance over the paper at the center, then work alternately toward each shoulder.
- Ease short sections. Use the side of your thumb to press approximately 3–5 millimeters at a time in small, fan-like increments. Avoid sweeping the whole allowance in one direction.
- Recheck the flower. Compare the apex and both side marks with their original motif positions. Maintain the planned allowance rather than stretching fabric to rescue an off-center cut.
Stop At The Shoulders
Keep the lower concave tails and side points unbasted. Their freedom lets you move the paper aside and reach the junction while joining rows.
This hybrid preparation uses adhesive to control the dome while leaving access for hand stitching. If a section feels rigid with glue, correct it before joining; forcing the needle through that edge makes tension harder to judge.
Joining Curved Rows and Fixing Gaps at the Side Points
Lay the rows flat. Nest the basted dome against the loose concave edges of the two pieces above it, then clip both side registration points. Secure the apex last. An appealing center alignment can otherwise conceal an endpoint that has slipped.
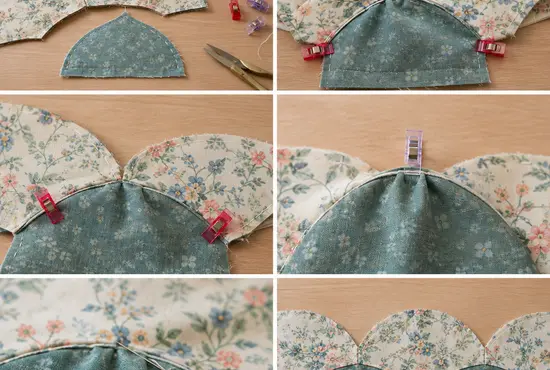
Start with a #10 or #11 milliner needle and 80-weight cotton or comparably fine polyester thread. Work an appliqué-style stitch with the pieces flat, or bring the folds together for a fine whipstitch. Aim initially for stitches in the range of 1–2 millimeters apart, catching small bites of fabric without piercing the paper. Pull only until each stitch settles.
Close The Junction
For a gap at a three-way meeting, check the cardstock tips first. Realign separated points rather than dragging them together with thread tension. Once aligned, add a figure-eight anchoring stitch through the adjoining fabric folds immediately beside the tips.
Release A Puckered Arc
Release two adjacent basting folds and unpick enough joining stitches for that section to lie flat. Redistribute the allowance gently with a stiletto tip, keeping it clear of the fabric threads, then restitch without stretching the dome.
The historic clamshell patchwork quilts in the Smithsonian collection offer another place to look at the pattern’s repeating curves.
Before cutting your next floral clamshell, will you keep the full bloom inside the exposed dome, or deliberately let the neighboring row crop its lower petals?